If you find yourself in possession of a Word document where someone has typed two spaces between every sentence and you need to change those to use just one space, Word makes it easy to do a find and replace that changes all instances with a single command. Here’s how to do it.
What’s the Deal with Single and Double Spaces, Anyway?
The single or double space between sentences argument has been an ongoing one for decades. Traditional, pre-digital typesetting required the use of double-spacing after periods and colons. This was largely due to the limitations of now-antiquated technology and was the standard style taught by most schools until around 20 years ago. With the advent of digital printing, the need for double spaces isn’t really a thing, anymore. But a lot of people still adhere to the practice.
Even style guides don’t universally agree. The latest editions of the
Chicago Manual of Styleand
MLA both suggest a single space. The
APA guidelines currently suggest two spaces, but even they have gone back and forth over the years.
In the end, it’s all about your preference on personal documents, or the agreed-upon house style if you’re writing or editing documents for a school, business, or publisher. We’re not here to tell you which you should prefer.
However, if you do find yourself working on a document where someone has used two spaces after periods and you want there to be only one, it’s quick and easy to change them all in Word.
How to Change Double Spaces to Single Spaces
If you don’t have any text selected when you start this process, Word will search your entire document for double spaces. If you want to search only a specific part of a document, go ahead and select that text before you start.
Note that Word will search for all instances of two spaces—not just spaces between sentences. This means, for example, that if Word finds a place where someone has used five spaces instead of a tab to align text, it will replace some of those double spaces. For that reason, especially in longer documents, it’s usually safer to perform this procedure on bits of selected text at a time rather than your whole document.
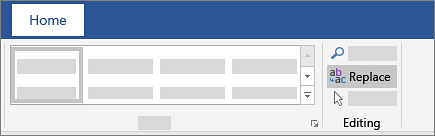
On the Home tab of the Ribbon, click the “Replace” button over on the far right to open the Find and Replace window. You can also just press Ctrl+H.
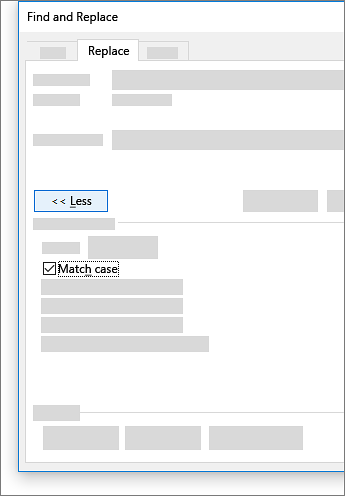
You’ll now find yourself in the Find and Replace window, on the “Replace” tab. Type two spaces into the “Find What” box, and then type one space into the “Replace With” box. Basically, we’re telling Word to search the document for all instances of double spaces and replace each with a single space.
If you want to go ahead and replace everything it finds, go ahead and click the “Replace All” button. You can also click your way through the document with the “Find Next” button if you want to check each instance before replacing it. That part is up to you.
If you clicked the “Replace All” button and let Word search your whole document, you’ll see a simple notification telling you the number of replacements that Word made.
If you searched only a selection of your document, Word will also offer to search the rest of the document for you.
Either way, all the instances of the double spaces in your document or selection should now be corrected to a single space.
When Google released the Chrome web browser in 2008, it also released its source code to the public through the Chromium project. The code was issued under the BSD (Berkeley Software Distribution) license, which meant that the source code for Chromium may be freely used, copied, modified, and distributed for use in other programs.


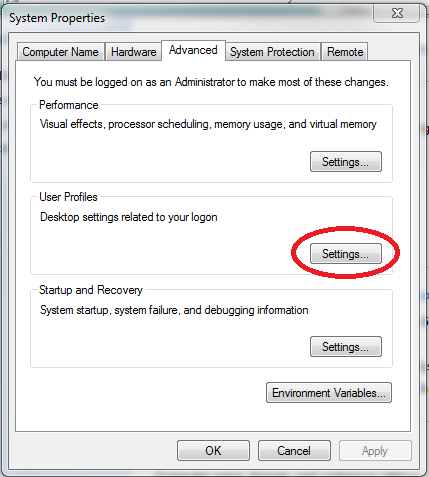
 2. Select Settings.
 3. Tap Accounts.
 4. Select Family & other users.
 5. Tap "Add someone else to this PC."
 6. Select "I don't have this person's sign-in information."
 7. Select "Add a user without a Microsoft account."
 8. Enter a username, type the account's password twice, enter a clue and select Next.
 10. Select the User icon at the upper left corner of the Start menu.
 11. Select the new user. You'll then sign into your account with your password from step 8.
 You're now using a non-Administrator account!